
i don't know why i felt brave enough to tackle this project but i'm sure glad i did!!!
my grandmother gave me this chair, that she had in her house since forever, when she downsized a couple of months ago.... i thought it was a cute enough chair but the maroon red wasn't my cup of tea. one day i was feeling restless so i took a flat head screw driver and popped a few of the old nail heads off (see bottom left of the seat). after inspecting i told my husband, "oh yeah. i totally have this." i think i was trying to convince myself more than him :)

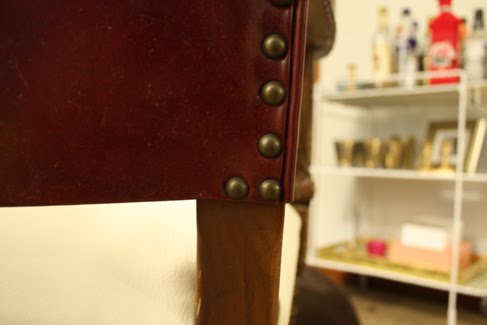
here's the chair in it's blood red state. mmm. blood red.


and the back. it wasn't a full re-upholstery job so i thought it was a good project to start with. now i have my sights set on one of her old wingbacks... another story for another day! (cross your fingers.)

i figured if i screwed it up and it looked awful:
1) it couldn't look that much worse than before, right?
2) then i'd just take it to someone and pay for them to fix my mistakes.
the only loss would be the cost of the fabric and nail heads and my time. piece of cake.


i took plenty more befores documenting what it looked like so i could constantly refer back to get it right when i was putting her back together. i recommend this step.
i looked back. ALOT.

here is me starting to sweat. there was no going back from here!
i started with the seat. removing the old faux leather was the hardest part in my opinion. my hands got battered and abused, and stabbed (only once) by my screw driver.... oh and stabbed once too, by those unsuspecting but ferociously sharp little nails.

turns out the whole thing was put together with those nails and nail heads. that's it.

again, me starting to sweat. i didn't replace any of the insides. just the outsides.


i used white and gold to bring her up to the current century.

once the seat was done and it looked far better than i thought i would have done, i had to remove the back, front and arms.

again, it was hard. and it hurt. but i felt like i was in the home stretch.


the arms finished. (and please excuse any messy bits you see on my carpet... nobody said it was a neat and tidy thing to reupholster a chair.)
(and while we're on the subject of the floor, please excuse the ugly carpet. the owners before us chose that lovely color and we're working on a replacement plan.)

et voila!!!
she's done!!!

i added a little mexican blanket i got on one of my trips down there. it was looking a little too white in that corner. but we're working on that too.

et voila!!!
she's done!!!
and i know that i didn't take her photo without the blanket and it may appear as if i was hiding something, but i swear, it's perfect! i can't stop looking at her, or walking by just to make sure she still looks awesome.
or smiling.

i added a little mexican blanket i got on one of my trips down there. it was looking a little too white in that corner. but we're working on that too.
and here's a shot of the tools i used. all ones i had. i know there are specific upholstery tools but i didn't even need them.


total cost of the job: under $45.
now, i understand this isn't the cutest chair in the whole wide world but i like it because it was my grandma and grandpa's.
and i like it when a project works and doesn't flop :)
and i like it when a project works and doesn't flop :)
happy monday.
JILL


Wow - super impressed! I love the look of nailhead trim...
ReplyDeleteyou go girl ... you totally rocked on this project ... looks FABulous ... it looks too nice to sit on :)
ReplyDeleteunbelievable. I admire your skills greatly! ah, wish I was crafty like you!
ReplyDelete